
Managing a homelab is all fun and games until you’re knee-deep in IP addresses, SSH keys, and trying to remember if this server was the one with Kubernetes or the one you broke last Tuesday.
SSH-ing into multiple machines gets messy fast – unless you love memorizing IPs and usernames like some sort of 2000s hacker movie character.
I didn’t 🤷♂️
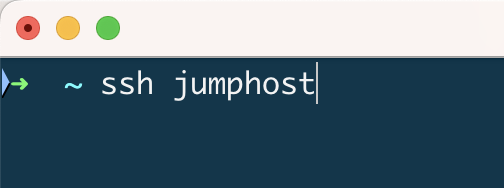
So, I set out to build an SSH jumphost that keeps a list of all servers and lets me connect to any of them by simply picking a friendly name from a menu. No more mental gymnastics – let me show you how I did it.
The problem: too many hosts, limited brain space
In a typical homelab, you have a bunch of VMs, containers, and maybe bare-metal boxes humming away. Each has its own IP, username, and SSH key. Unless you’ve got the memory of an elephant, you’re either:
- Constantly running
ssh [email protected] - Digging through the
.ssh/configfiles - Or, worst of all – copy-pasting IPs and credentials from some dusty note in Obsidian
We can do better!
BTW here’s some more on brain space and why we keep forgetting about the to-dos: https://igortkanov.com/too-many-tabs-open-why-real-multitasking-is-hard/
The goal: pick a server from a menu, Enter, done
I wanted something simple:
- A single jumphost that holds the “keys to the kingdom” (figuratively, please don’t expose this thing to the internet raw)
- A menu-driven SSH selector where I can pick a server by name, not by IP
- Minimal fuss when adding new servers.
All files mentioned below are available in the following repository: Github
The setup: building the jumphost
1. Spin up a jumphost VM
- I dpeloyed a fresh Proxmox VM with a minimal Ubuntu server. How nice is it that you can import your public keys from Github directly during installation!
- Next, I applied standard security configurations and basic hardening (disable root login, enable and configure UFW, you know the drill)
- Finally, I created a new user,
jumphostuser, with limited permissions for daily use.
2. Fuzzy-finding servers with “fzf”
Here’s where the magic happens. I used fzf, a command-line fuzzy finder, to make server selection slick and interactive. More info on fzf is available on the project’s home page at https://github.com/junegunn/fzf
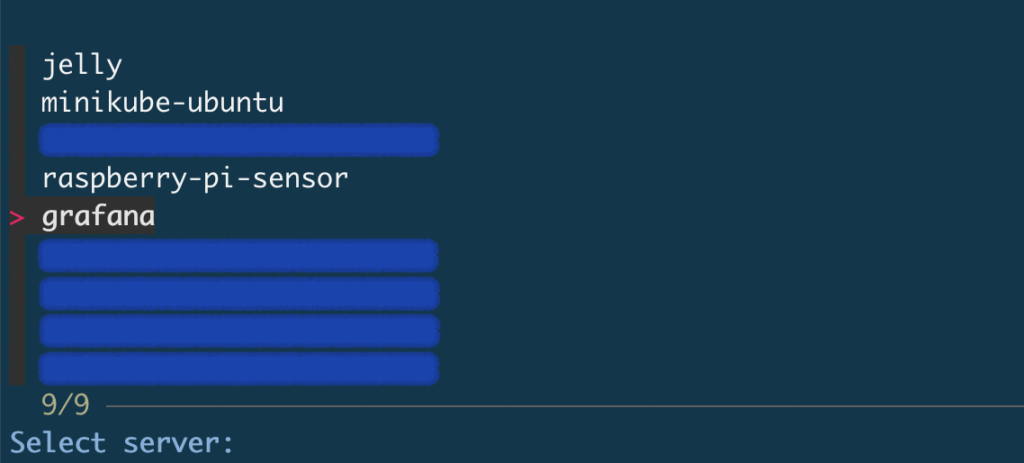
3. The “select host” script
The secret sauce is a simple bash script that reads your ~/.ssh/config, lists all defined hosts, and lets you pick one to SSH into.
1   #!/bin/bash
2
3   # Run only in interactive SSH sessions
4   if [[ -z "$SSH_TTY" ]]; then
5       exit 0
6   fi
7
8   HOST=$(grep "Host " ~/.ssh/config | awk '{print $2}' |
    fzf --prompt="Select 9 server: ")
9
10  if [ -n "$HOST" ]; then
11      ssh "$HOST"
12  else
13      echo "No host selected. Exiting."
14      exit 1
15  fi
Here’s how it works:
- Line 4-6: Ensures the script only runs in an interactive SSH session, so it won’t trigger in cron jobs or scripts. Not that the jumphost will ever have any of those, but you never know.
- Line 8: Greps the
~/.ssh/configfile for all host entries and pipes them intofzffor a nice, interactive menu. - Line 10-15: If you select a host, it SSHes right in. If not, it exits politely.
It is important to make the script executable with something like chmod +x select_host.sh
This script, called select_host.sh, is available in the repository: Github

4. Autoload on SSH login
To make the experience seamless, I added this to .bashrc:
# Run the SSH server selection script only for interactive SSH sessions
if [[ $- == *i* ]]; then
    ~/select_host.sh
fi
Now, whenever I SSH into the jumphost, it drops me right into the selection menu. No extra commands needed.
SSH key management
Here’s how to make jumphost known to all the target servers:
- Generate a dedicated key pair on the jumphost (
jumphost-key) - For every new VM or container, add the jumphost’s public key to
~/.ssh/authorized_keys– so the jumphost can reach it - The jumphost itself has the public keys from the systems I connect from (my laptop, desktop, etc.).
These keys should be added to.ssh/authorized_keyson the Jumphost server.
This keeps the jumphost as a central hub—no need to manage dozens of keys on your daily driver.
Next steps: automate All the Things
Manually adding the jumphost key to every new VM or container is fine… for like two servers. After that, it gets old fast. Next on my list is automating key injection into new VMs/containers post-deployment using cloud-init, Ansible, or something more Proxmox-native.
Or maybe a similar approach to what the Ubuntu Server installation script does − pulling keys directly from GitHub or GitLab:
curl -O https://github.com/<username>.keys
curl -O https://gitlab.com/<username>.keys
Either way, I’m open to ideas on this! Because if there’s one thing better than SSHing with a single click, it’s not having to manually copy the key every time 😃
⚠️ A word of caution
Don’t use this for production! This setup is great for a homelab, but it’s not suitable for production or publicly exposed systems as-is.
- The jumphost has port 22 open all the time − if it’s exposed without proper hardening, you’re asking for trouble.
- Consider
fail2ban, enforcing key-based authentication only, and maybe even setting up a VPN if you’re serious about security.
In short: great for tinkering in your lab, terrible for anything customer-facing.
Final thoughts
A jumphost like this makes managing a growing homelab way less painful. No more hunting for IP addresses or wondering which SSH key works where. Just pick a name, hit Enter, and you’re in 🙌
If you’ve got ideas to improve this setup, especially on automating key distribution, drop them in the comments or shoot me an email. SSH it like it’s hot! 🚀
Download all files mentioned above: Github